Doh, sorry dude... never installed it so I didn't realize that was going to be an issue.
I'd pound a small part of the tube flat. That's the "Lazy Lenko" way


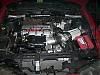
you could use a wrench to hold the injector in.
horsepower is how hard you hit the wall, Torque is how far you push the wall with you
couldnt you make a small gasket between injector and intake to fill the gap just my 2 cents
thick rubber washers, you could probably find them at Lowes. I would also say some teflon tape would be a good sealant here also. ( also found at Lowes, plumbing dept.) that would probably be easier to work with.
M90'd Built LGO-15 PSI
http://webstarts.com/quadper4mance
no need to stress this issue man, just flaten the pipe a bit. thats what id do. just do it on the bottom of the pipe so u dont see it.
01' Z24 5 speed
422whp/400wtq
T4 Turbocharged
Built LD9
HP Tuners
I have the same kit... but never gave the "gap" issue a thought. It doesn't really have any effect on my setup because I screwed it into a 90 degree rubber elbow right off of the throttle body because my short ram drops straight down off of my H.O. mani. You'll think of something I would def. try the rubber washers before flattening a spot on the tube. You'll be happier with it. Good Luck.
Teflon tape.

" To study and not think is a waste. To think and not study is dangerous. "
GO TO NAPPA SPEND 5 CENTS AND GET A RUBBER O-RING TO FITH TE INJECTOR
bring your injector to match the 0-ring size
THERE CAN BE ONLY ONE, i have already died once and im still here so lets just leave it on the track
do people not read previous posts? ^^^
(and that's NAPA)
LD9 F23 FTW!!
I hit the reply button to your post the instant I finished reading it because it was a pretty easy answer


" To study and not think is a waste. To think and not study is dangerous. "


